How to ride a GPX
Every route here is a free GPX download. Load it into an app that works offline and follow the line — here's how, in whichever app you use.
Google Maps doesn't know these trails and won't work without signal — and most of the good riding has none. Use a GPX-capable app with downloaded offline maps so your route and live position keep working when the bars run out.
The easiest option — our own free Android app with all 207 Chiang Mai trails already built in. No file juggling: open the map, pick a trail, and ride it offline. It also records your rides and tracks your bike's service.
Visit Dirt Bikin' (our app) →Step 1 of 2 · Import
Download Dirt Bikin' (free) and sign in with Google. Every trail on this site is already bundled in the app — there is nothing to import to get started.
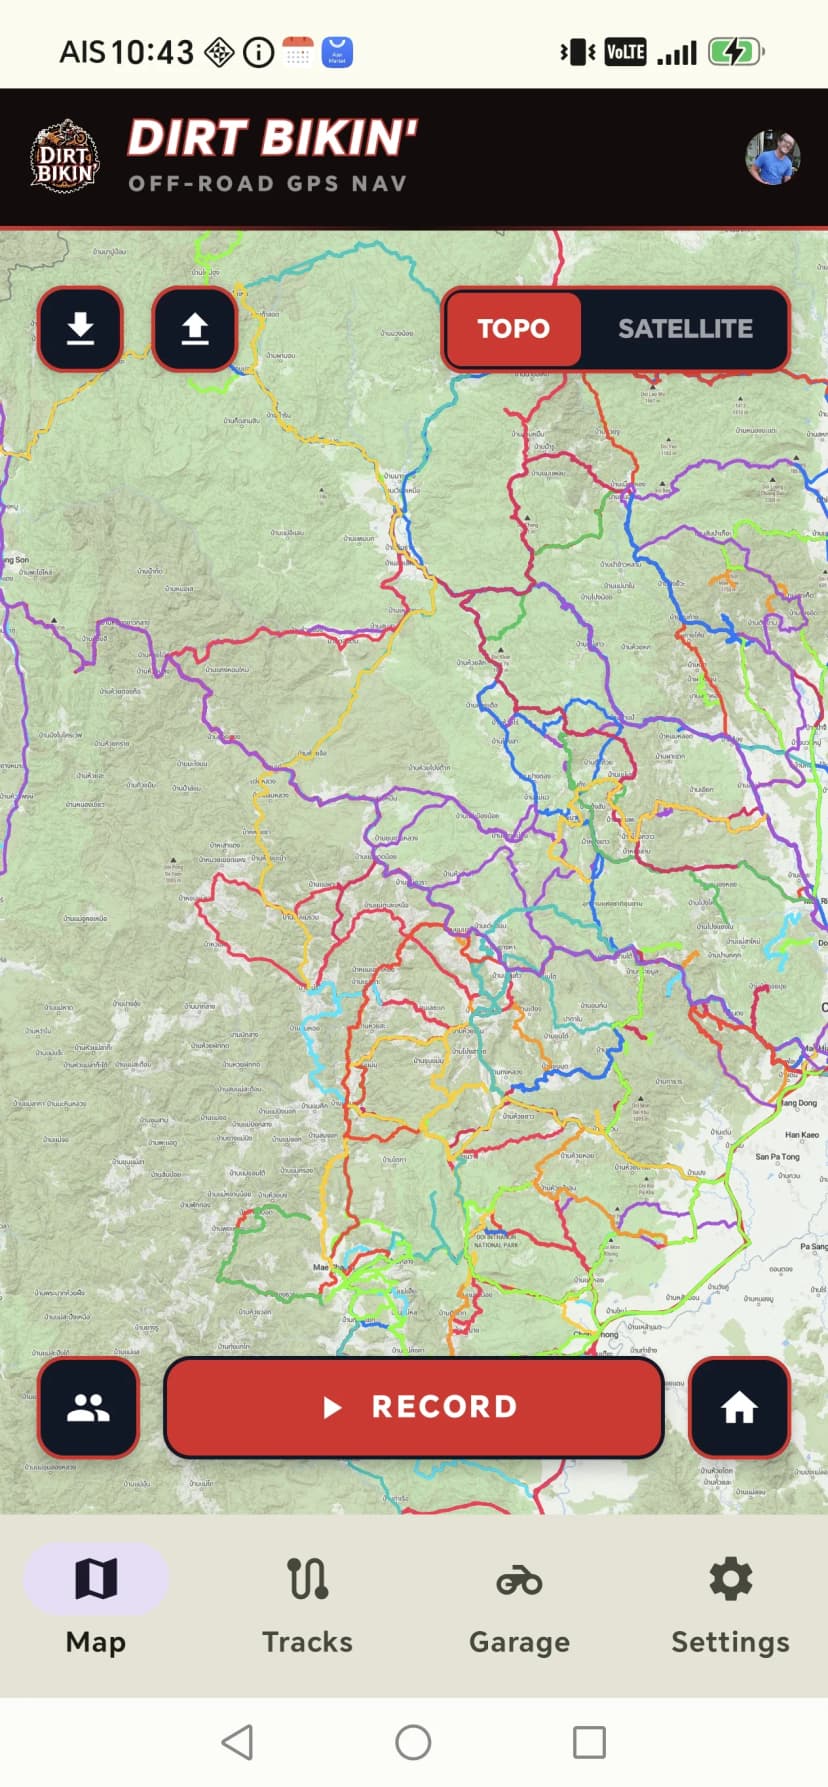
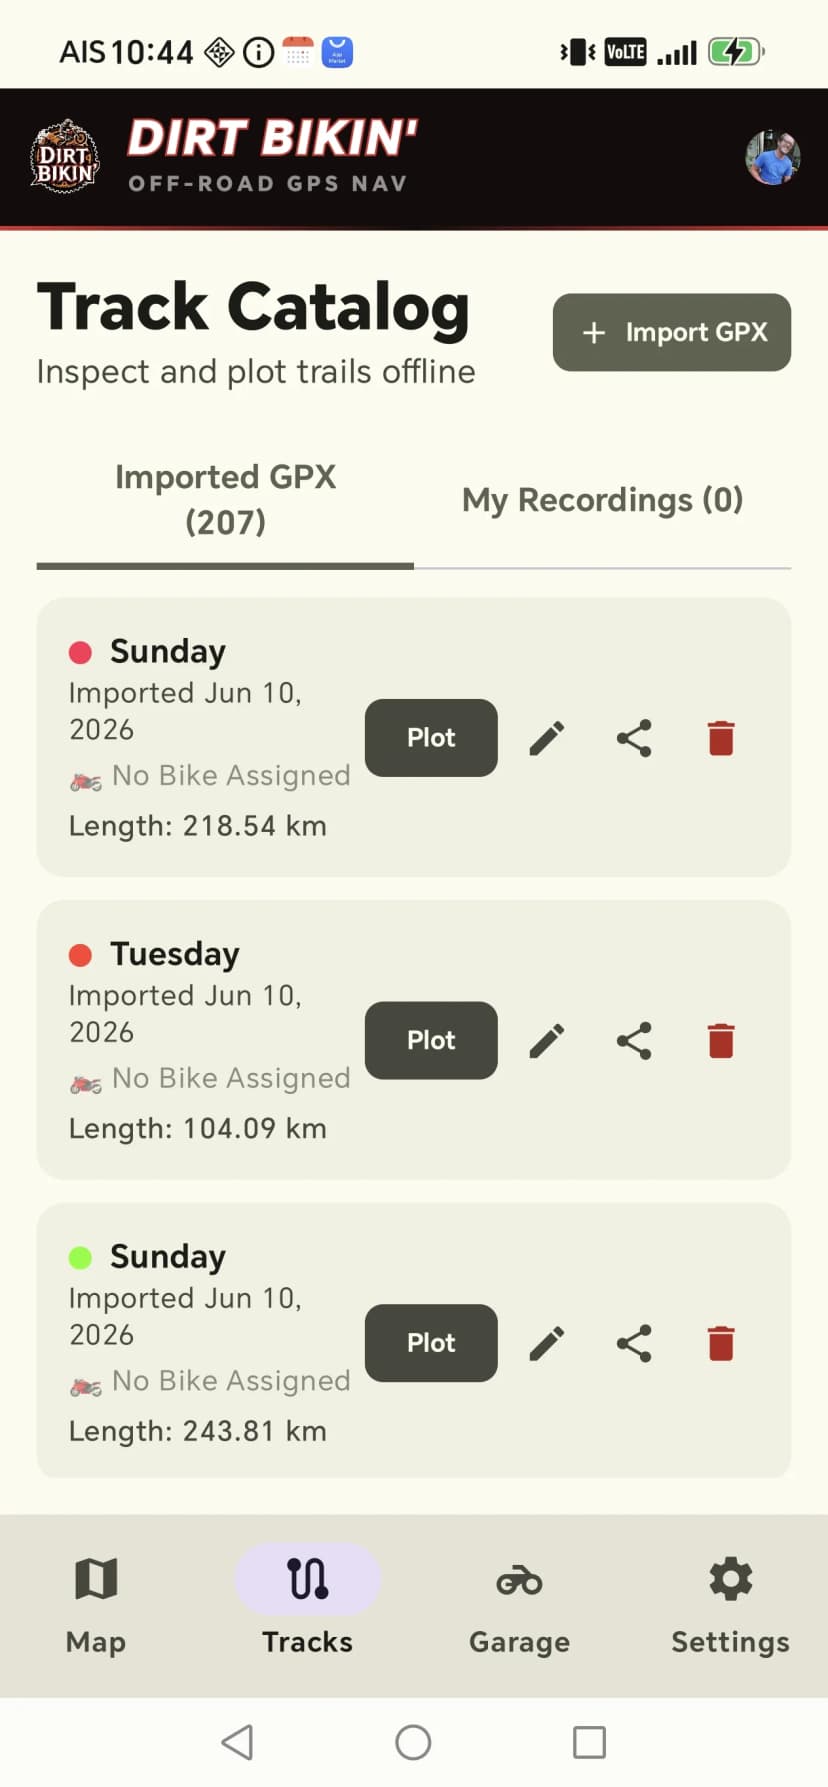
Open Tracks to see the catalog — 207 trails ready to go. Tap Plot on any trail to draw it on the map. You can also tap Import GPX to add your own files.
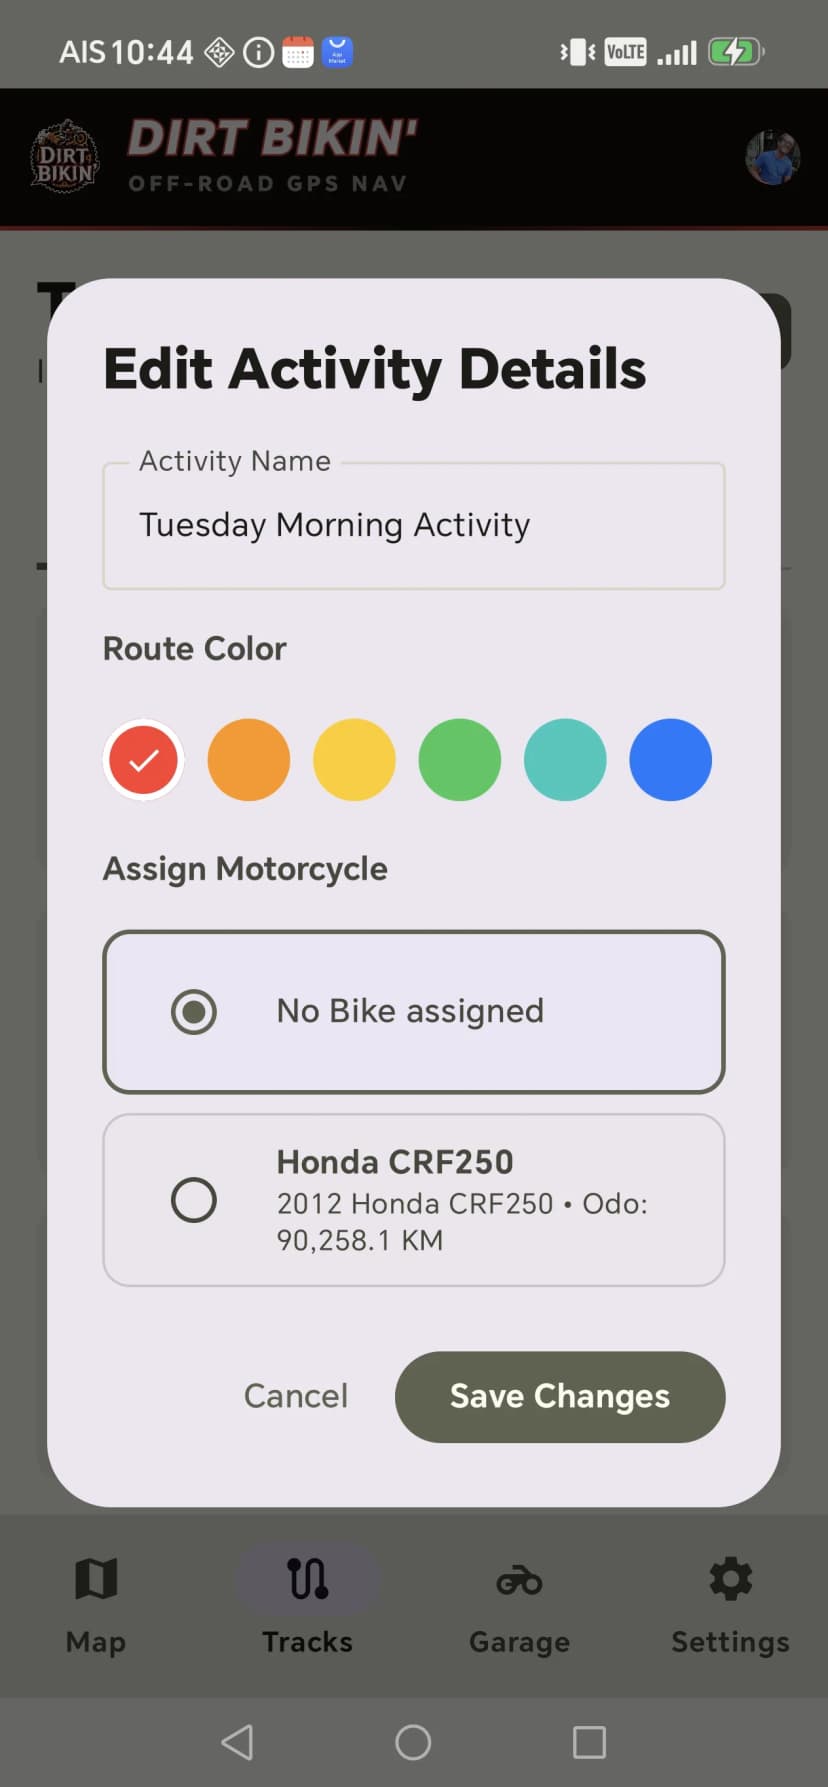
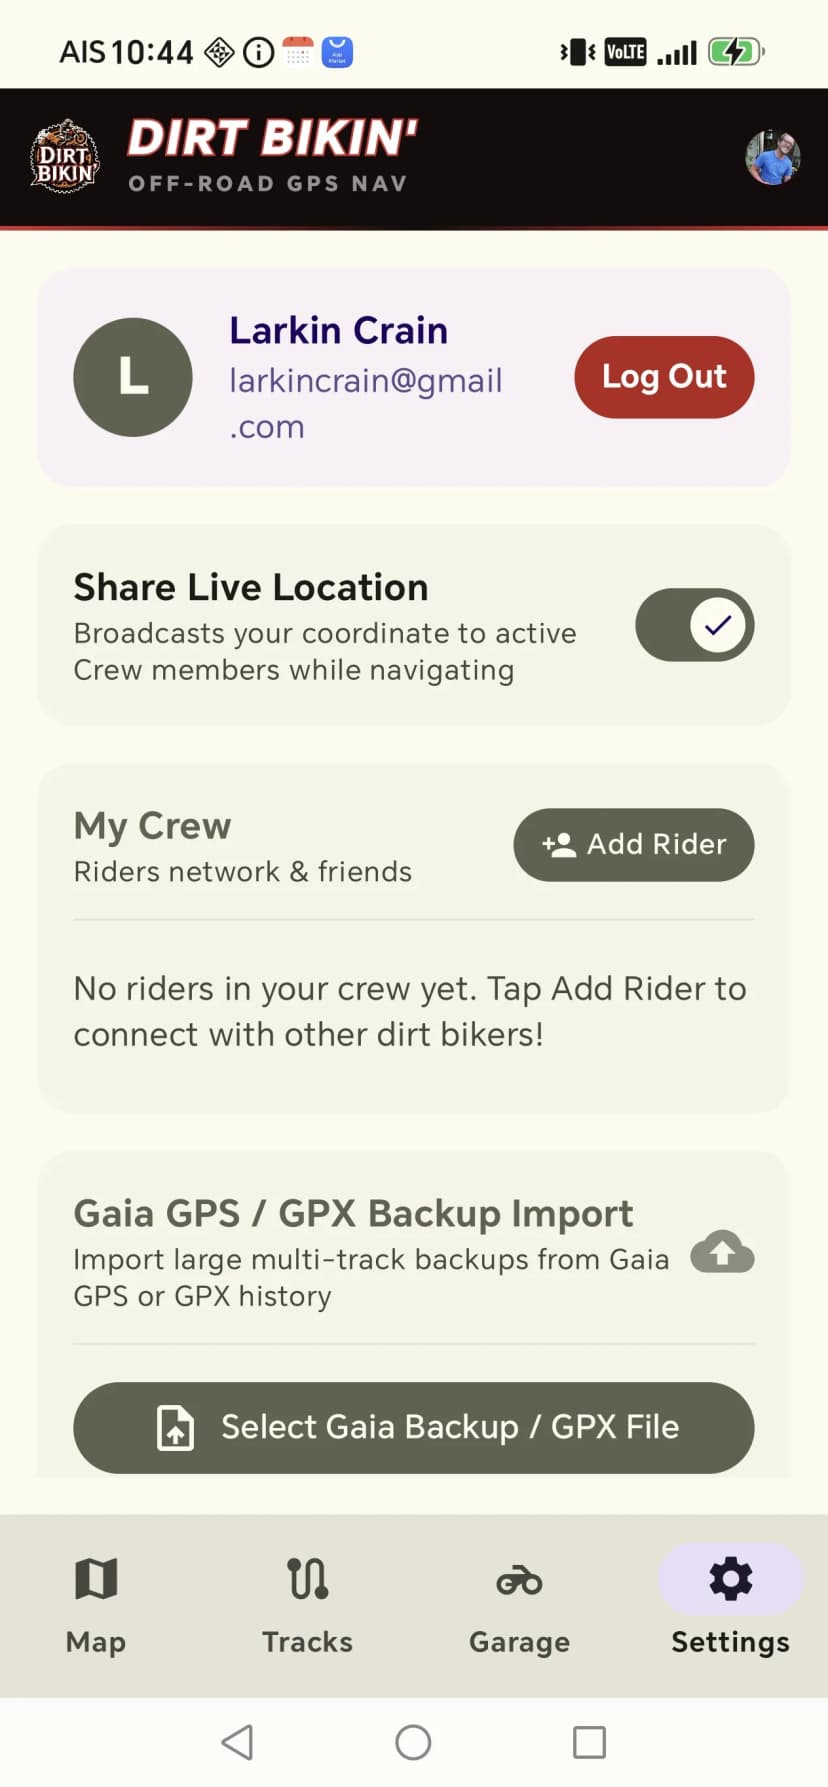
Tap a track to edit it — pick a route colour and assign one of the motorcycles in your garage so your rides stay organised.
On the map screen, tap the download icon to save the offline map region before you ride. Trails around Mae Cham and Mae On have no mobile coverage — download while you still have Wi-Fi so the map never goes blank.
Step 2 of 2 · Navigate
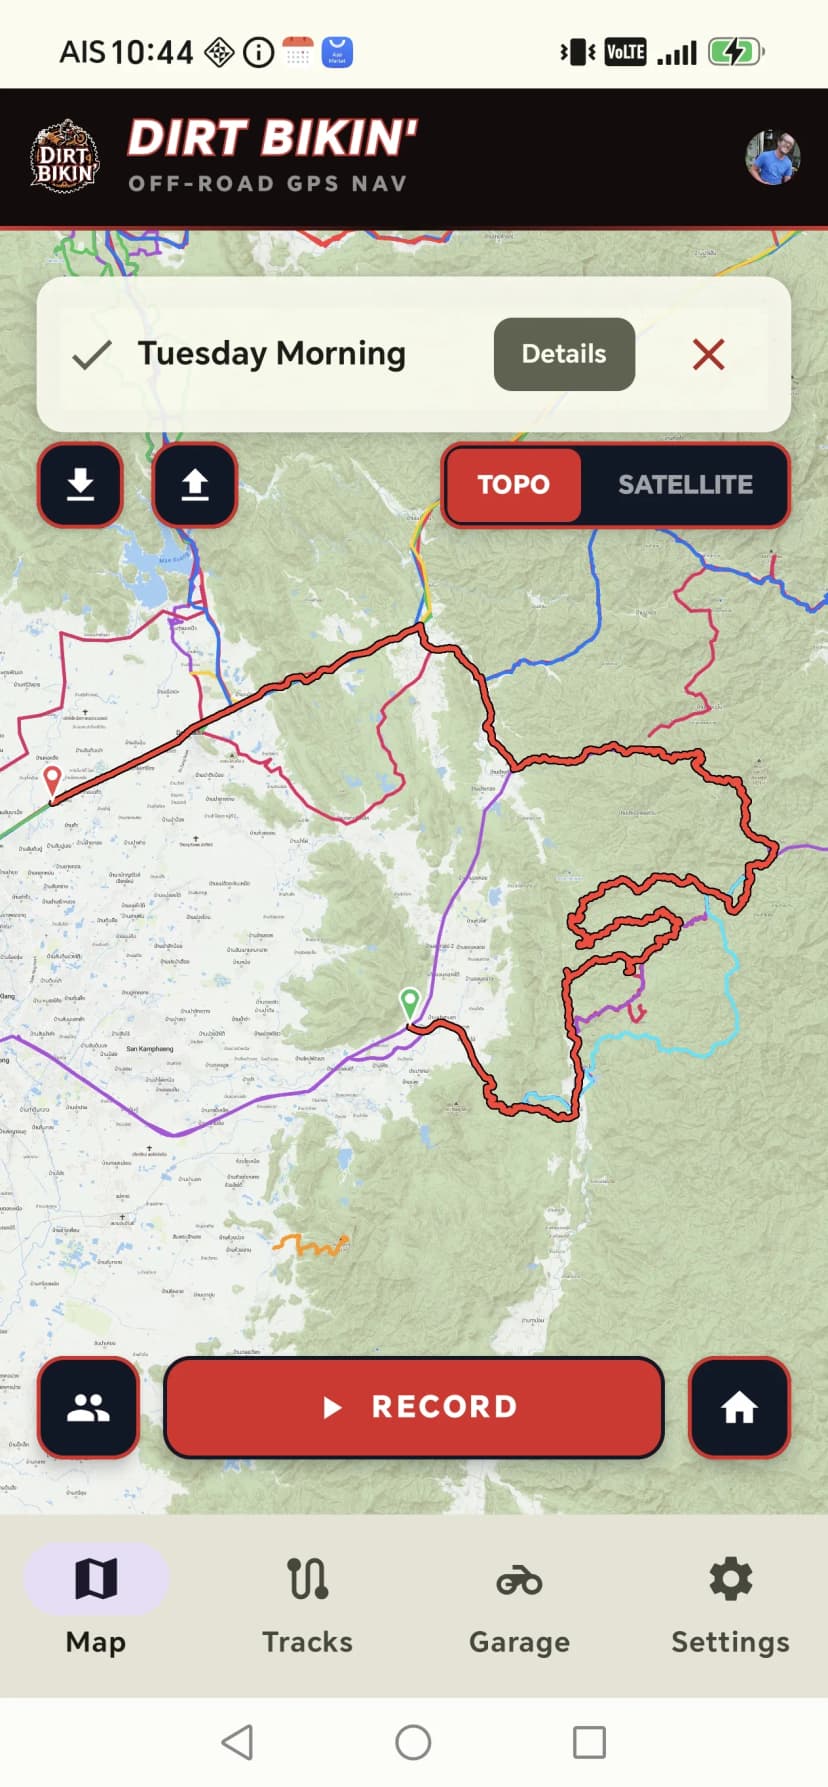
Plot a trail from the catalog and the app draws it on the topo or satellite map. Your live GPS dot follows the line so you always know where you are on the trail.
Tap Record to capture your track as you ride. Stop when you are done and it is saved under My Recordings, ready to replay, rename, or share.
Turn on Share Live Location in Settings and add riders to your crew to see each other on the map while you navigate.
Troubleshooting
You did not download the offline map region. Back on Wi-Fi, open the map and tap the download icon to save the area you will be riding.
Open Tracks and switch to the My Recordings tab. Every ride you record is saved there to replay, rename, colour, or share.
Give the phone a minute with a clear view of the sky for a solid fix, and keep it out of a metal tank bag. A few metres of drift is normal — trust the track line.
- ✓Download the route's GPX from its page
- ✓Save offline maps for the whole area you'll ride
- ✓Start with a full tank — stations thin out in the hills
- ✓Tell someone your route and expected return time
- ✓Ride within your limits; turn back if it stops being fun